Planning enclosed trailer outfitting for mobile work? Whether you’re a mobile mechanic, contractor, mobile detailer, or pop-up vendor, the difference between a trailer that pays for itself and one that frustrates you every day comes down to how you fit it out. This guide walks through every step of enclosed trailer outfitting — floor plans, E-track shelving, power, tool mounting, generator setup, and ventilation — plus the brand picks and budget breakdowns that match each use case.
Why Enclosed Trailer Outfitting Matters
Most buyers focus on the trailer purchase and treat outfitting as an afterthought. That’s a mistake. A properly outfitted enclosed trailer pays back the investment in saved setup time within months: every minute you spend digging through a disorganized trailer is a minute you’re not billing the customer.
If you’re still shopping for the trailer itself, our enclosed trailers for sale buyer’s guide covers sizing and brand selection. Pick the trailer first, then come back here for outfitting.
Step 1: Plan the Floor Plan Before You Drill Anything
The biggest enclosed trailer outfitting mistake is mounting tools before you’ve thought through workflow. Take an empty hour. Sketch the trailer interior on paper. Mark where tools live, where you stage materials, and where you’ll be standing during work. Sketch traffic flow.
Three layouts cover 90 percent of mobile work:
Walk-Through Layout: Workbench at the front V-nose, shelving down both side walls, open floor in the middle. Best for trades that haul a lot of material in/out (electrical, plumbing). Stages of work happen at the bench.
One-Side Layout: Heavy shelving and workbench down one wall, open floor and tool mounts on the other. Best for trades that need a generator and air compressor running while they work (paint, mobile detail, body work).
Garage Layout: Open floor with floor-mounted tool boxes, ATV/UTV ramp door usable. Best for trades that haul equipment AND need it secured (lawn care, agriculture, vendor pop-ups).
Step 2: Power System for Your Enclosed Trailer Outfitting
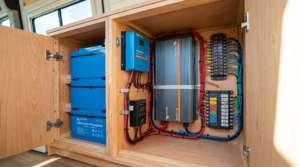
Power is the spine of any mobile setup. Three options, in order of cost and capability:
Shore Power Only
A 30A or 50A inlet on the side of the trailer connects to a customer’s outlet or a generator parked outside. Cheap ($200–$400 installed), zero maintenance, but limits where you can work. Good for jobsite work where you can plug into the customer’s panel.
Onboard Generator
A 3,000–7,000 watt inverter generator (Honda EU3000is or Champion 4500) lives in a vented compartment near the front of the trailer. Powers tools, lights, AC. Cost $1,500–$3,500 plus install. Required if you work at sites without power.
Battery Bank with Solar
Lithium battery bank (200–400 Ah) plus a 200–400 W solar array on the roof, charging through an MPPT controller. Silent, no fuel, but lower sustained-load capacity. Cost $2,500–$5,000. Best for vendors and detailers who need 4–6 hours of moderate power. Can be combined with a generator for hybrid setups.
Step 3: E-Track Shelving and Tool Mounting
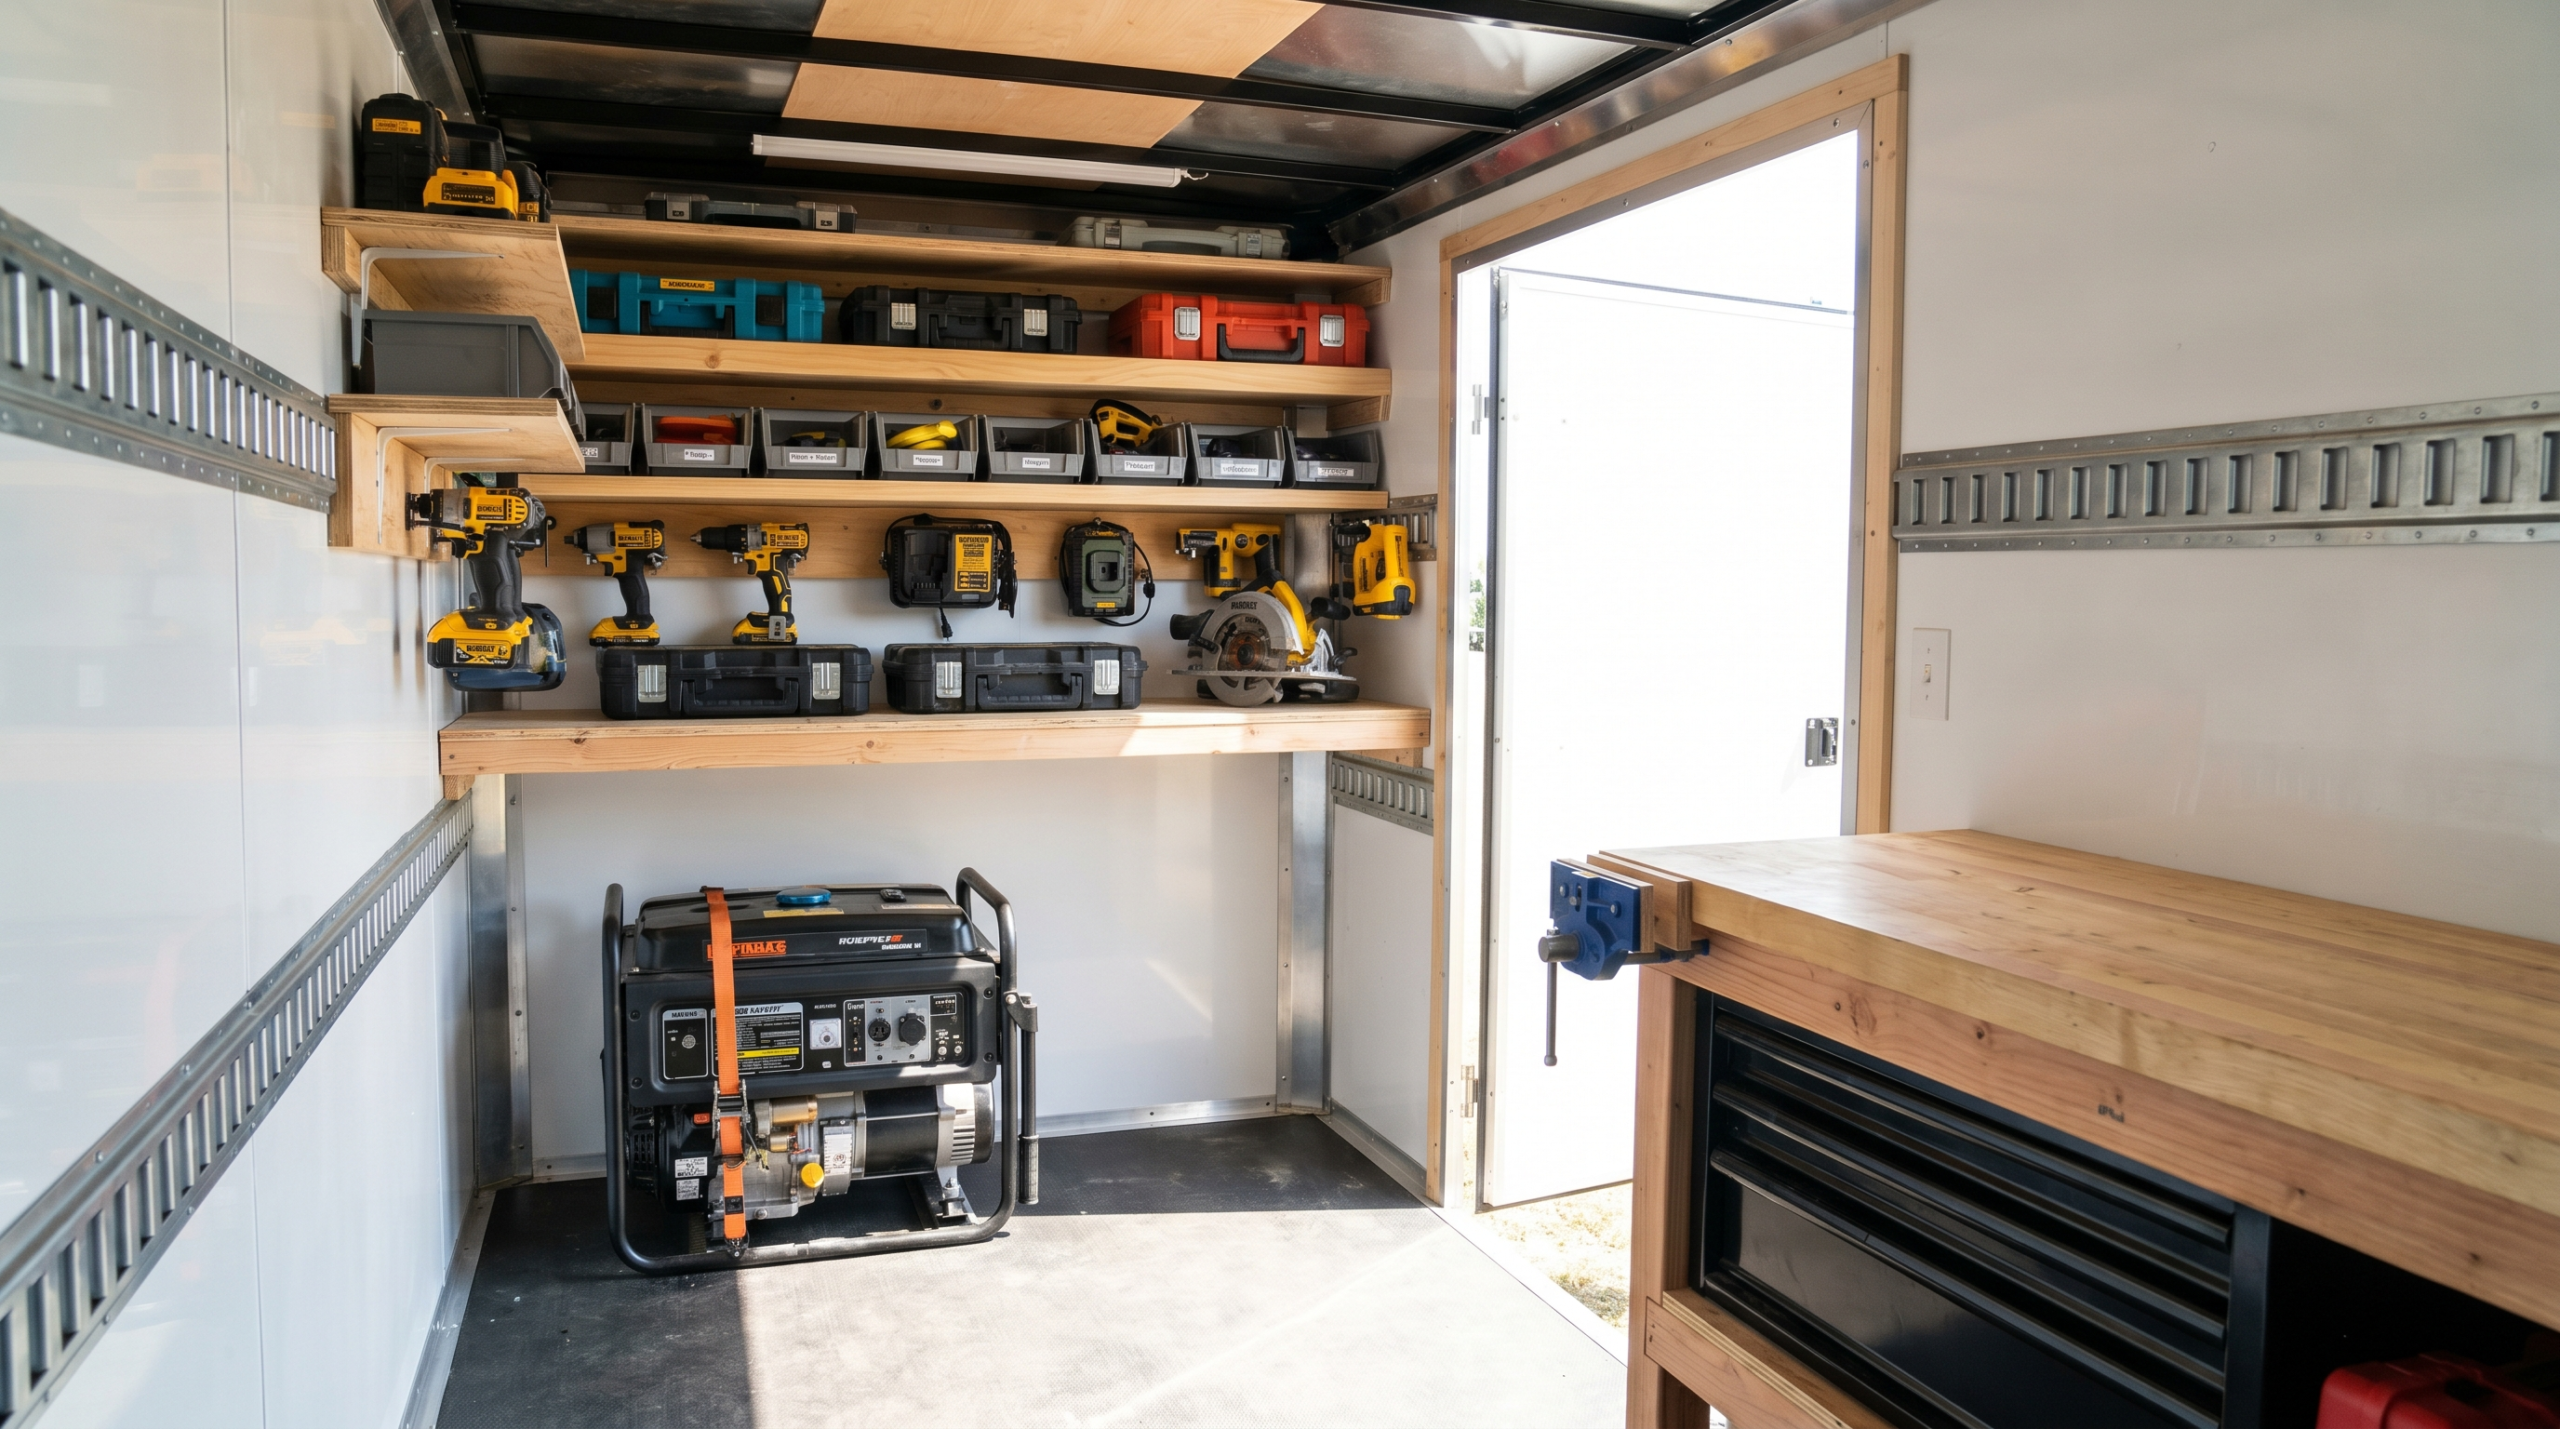
E-track is the universal mounting standard for enclosed trailer outfitting. Horizontal rails run the length of each side wall (and across the front bulkhead) and accept tie-down rings, shelf brackets, panel hooks, and tool mounts.
Three runs of E-track per side cover most setups: one at 18 inches off the floor (low ties), one at 36 inches (mid-rail for shelving), one at 72 inches (top rail for cabinet anchors). Buy the heavy-duty 12-gauge horizontal type, not the F-track variant — it’s stronger and the accessories are easier to find.
For shelving, shop at industrial suppliers (Uline, Grainger) rather than big-box. The 18×36 inch and 18×48 inch wire shelves with E-track-compatible brackets cost $60–$120 each and accept 200+ pound point loads. Skip residential closet shelving — it sags under tools.
Step 4: Workbench and Vise
A solid workbench changes how you use the trailer. Standard build: 2×4 or 2×6 frame on a wall-mounted ledger, 1½ inch plywood top with a 1/8-inch steel sheet glued and screwed over it. 24 inches deep, 48–60 inches wide, 38 inches off the floor (standing height for most adults).
Mount a 4-inch or 5-inch bench vise at one end. Bolt through the steel-and-plywood top with grade-8 hardware, into a steel mounting plate underneath. A vise that’s wobbly is worse than no vise.
Lighting matters. Run a row of LED shop lights above the bench (4-foot, 5,000K daylight, plug into the shore-power circuit). Total budget for bench plus lighting: $200–$400.
Step 5: Floor and Wall Protection
Most factory trailers come with 3/4-inch plywood floors and luan walls. Both wear fast under daily use. Three protection options:
Rubber coin-pattern flooring: 3/16 inch coin matting glued down. Easy to clean, reduces noise, protects the plywood. $2–$3 per square foot.
Aluminum diamond-plate kick plates: 24-inch tall on the lower walls. Protects from dings, dents, and tire scuff marks. $300–$600 per trailer installed.
White FRP wall panels: Fiberglass-reinforced plastic over the luan. Easy to clean, bright reflective surface improves lighting, food-safe rated. $400–$700 per trailer for full walls.
Step 6: Ventilation and Climate
An unventilated enclosed trailer in summer is unworkable. Two-vent system minimum: one passive vent at the front near the ceiling, one powered vent at the rear pulling air out. Maxxair 12V powered vents are the industry standard at $80–$150.
For year-round work, a 5,000–12,000 BTU rooftop AC unit (Coleman Mach or Dometic Penguin II) handles trailers up to 8.5×20. Pair with a 3,000W inverter generator for off-grid AC. Total install: $1,500–$2,800.
Heat is simpler. A propane wall heater (Mr. Heater Buddy or a Suburban RV heater) draws minimal electric current and runs off a 20-pound tank. $200–$600 installed.
Outfitting Cost Reference
| Setup Tier | Total Cost | What’s Included | Best For |
|---|---|---|---|
| Basic Mobile | $1,800–$3,000 | E-track, shelving, basic bench, shore power, 1 vent | Side-gig contractor |
| Pro Mobile | $4,500–$7,500 | Full E-track, FRP walls, bench+vise, 4kW generator, AC, 2 vents | Daily working tradesman |
| Custom Build | $10,000–$25,000 | Custom cabinetry, lithium+solar, AC+heat, custom paint, slide-outs | Mobile detailer, vendor, full-time business |
How Much Trailer Do You Need?
Size your trailer to the bench plus a 4-foot working aisle. A 6×12 fits a one-side layout for a solo tradesman. A 7×14 is the sweet spot for most working contractors. 8.5×20 or larger lets you add a full workbench, generator compartment, and AC. Our enclosed trailer buyer’s guide walks through sizing in detail.
Match the GVWR to your equipment load too — a fully loaded mobile-mechanic outfitting can add 1,500–2,500 pounds of tools and shelving. See our GVWR guide for how to size payload.
Outbound References
For load securement when transporting a fully outfitted trailer, the FMCSA 49 CFR 393.100 rules apply just as they do for any other cargo. Bolt-mounted shelving counts as secured; loose tools do not. For E-track ratings and proper tie-down practices, the Uline E-track product reference is the industry-standard catalog.
Common Questions About Enclosed Trailer Outfitting
Can I DIY the outfitting or do I need a shop?
Most of it is DIY-able with a drill, a level, a stud finder for the metal frame, and basic carpentry skills. Generator installation and AC installation are best left to a shop unless you’ve done electrical work before — wiring a generator inlet wrong is a fire hazard.
Will outfitting void my trailer warranty?
Adding to the trailer (E-track, shelving, lighting) does not void the warranty. Cutting structural members or modifying the chassis can. Stay above the wheel wells and you’re fine.
What insurance changes do I need after outfitting?
Standard trailer insurance covers the trailer itself. The tools and equipment inside need a separate Tools & Equipment rider or a commercial inland marine policy. Tell your agent before you load it up; most riders run $15–$40 a month for $5,000–$25,000 of tool coverage.
How do I keep tools from rattling loose during transport?
Three rules. Anything heavier than 5 pounds gets bolted down or strapped through E-track. Anything lighter goes in a closed bin. Cabinets and drawers get latches — magnetic alone won’t hold on washboard roads.
Should I insulate the trailer?
Yes, for any setup with AC or heat. 1.5 inch foam board between the studs adds R-7 insulation and dramatically reduces AC load. $300–$600 in materials for a 7×14.
Ready to Buy?
The right enclosed trailer outfitting setup turns a trailer into a complete mobile workshop. Start with the trailer, then plan the layout, then build it out one step at a time.
Browse enclosed trailers for sale and look for trailers with side man doors, factory E-track prep, and shore power inlets — those features save thousands in outfitting costs. Pair this with our enclosed trailers buyer’s guide for sizing and brand picks.
Request a free delivered quote with the outfitting specs you need and we’ll send out-the-door pricing within one business day. Free delivery to all 50 states from PrimeLoad Trailers.